Using Caledon
Once you've installed Caledon, you can start building your site. In this section of the User Guide we will explain how you can set up your header, upload your logo, create your menu, set up your footer area, customize the general look and feel of your website, and create your first pages.
Setting Up the Header
One of the first things you might want to do after you have installed and activated your Caledon theme is to set up your header area. The header contains the logo, menu, search bar, side area icon, and other optional widgets.
To set up your header, navigate to Theme Options > Header from your WordPress admin panel. The settings you define here will be the default settings for all pages on your site. If you need any help in further understanding any of these options, please refer to the Theme Options section of this User Guide.
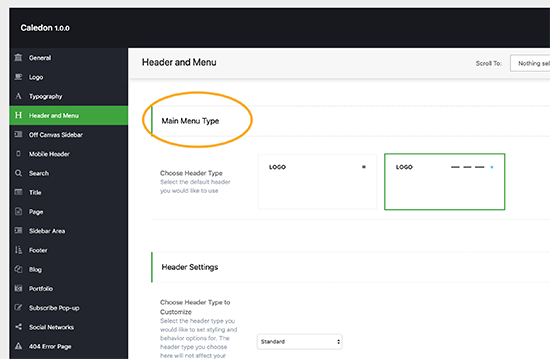
Some options, such as the header skin and background color, can be overridden on a page to page basis from a specific page’s backend. For more information on how local page settings work, please refer to the Pages section of this User Guide.
Uploading Your Logo
To add your logo to the header, navigate to Theme Options > Logo from your WordPress admin panel and click the upload button next to the Logo Image – Default field. After you upload your image and save the options, you should have a visible logo in your header area. For more information regarding the various logo types that can be uploaded, please refer to the Theme Options section of this User Guide.
Menu Creation
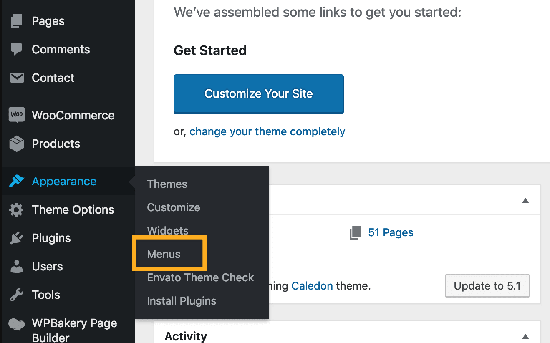
To create a new menu, navigate to Appearance > Menus from your WordPress admin panel and click on Create a new menu. Enter a name for your new menu and then click Create Menu.
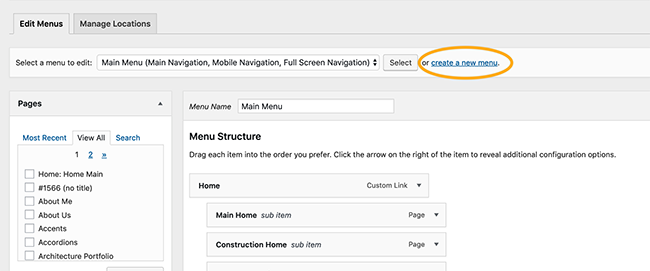
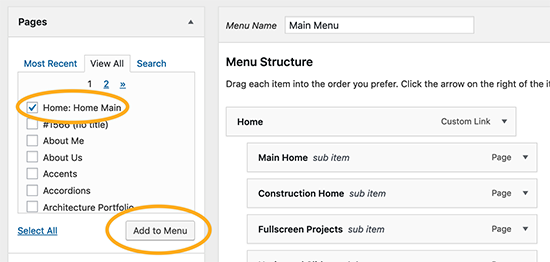
Every page that you have created will be listed in the section on the left named Pages. Simply check the pages that you would like to add to your menu and click the Add to Menu button. Once you have added pages to your menu, you can click and drag the menu items to rearrange them, or nest them one underneath the other.
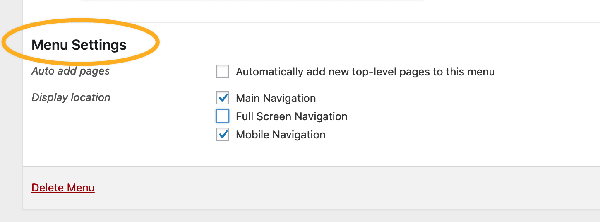
In the Menu Settings section (which is located underneath the Menu Structure section), check the checkbox next to Main Navigation and click Save Menu. This will activate the menu you have just created, and you should now see a functional menu in your header.
Footer
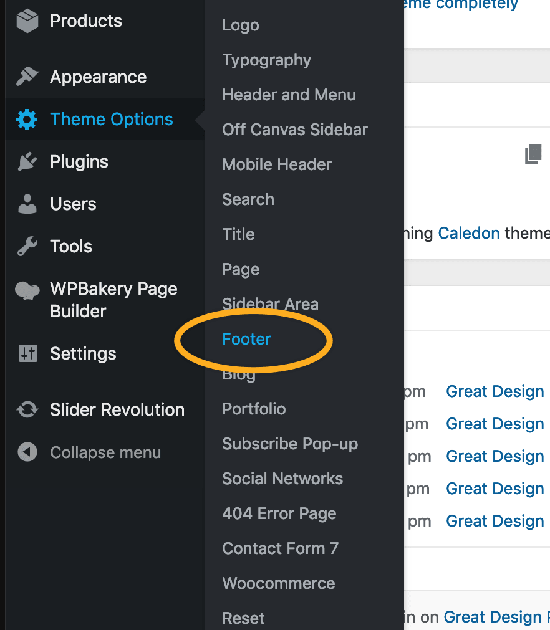
To set up your footer, navigate to Theme Options > Footer from your WordPress admin panel.
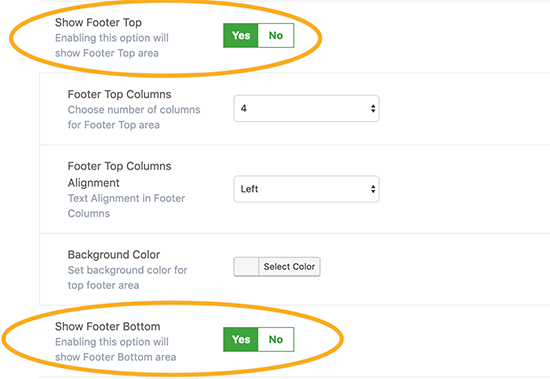
The settings you define here will be the default settings for all pages on your site. If you would like both the top and bottom footer areas to be displayed, make sure that both the Show Footer Top and Show Footer Bottom options are enabled. If you need any help understanding any of these options, please refer to the Theme Options section of this user guide.
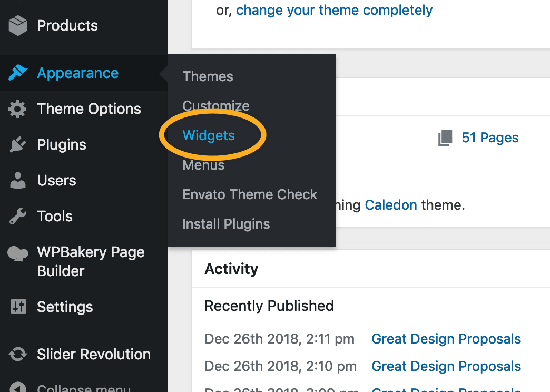
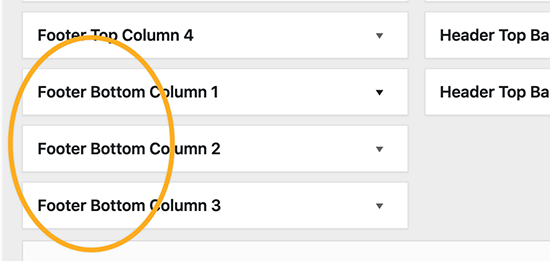
Content is added to your footer via widgets. Navigate to Appearance > Widgets from your WordPress admin panel. On the right side of your page you will see the widget areas for your footer. The widget areas for the top footer are named Footer Column 1, Footer Column 2, Footer Column 3, and Footer Column 4. On the left side of the Widgets page you will see the available widgets. To add a widget to one of the Footer widget areas, simply drag the desired widget to one of the Footer Column widget areas on the right.

To add content to the bottom footer, simply add widgets to the Footer Bottom widget area, or the Footer Bottom Left and Footer Bottom Right widget areas.
General Look and Feel
Now let’s set up the general look and feel of your site. If you have imported a demo site and would like to keep its general look and feel, then you do not need to do anything else. Otherwise, go to Theme Options > General and in the Font Family field set a default font family for your site. Next, in the First Main Color field set a default main color for your site.
Now that you have set up the basic elements for your site, you’re ready to start building your pages.
Building Pages
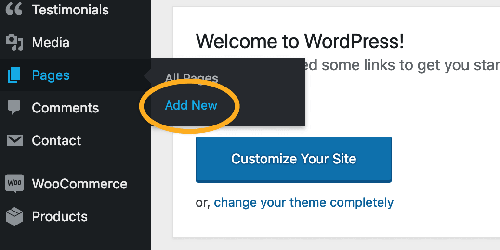
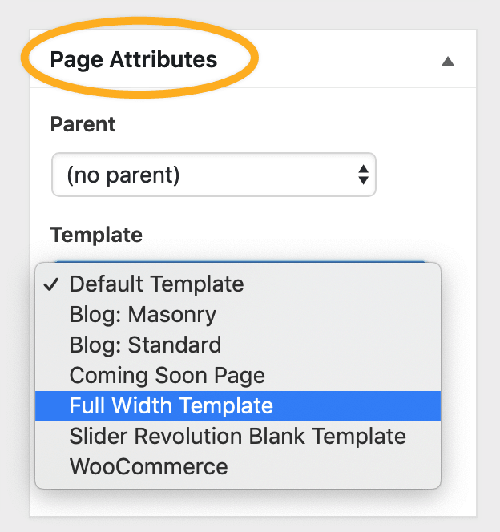
To create a new page, navigate to Pages > Add New from your WordPress admin panel. In the text field near the top of the screen enter a title for your page. After you have added a title, choose the “Full width” template from the section on the right named Page Attributes. This will allow you to add sections to your page that span across the whole width of the screen.
In the bottom section of your screen you will find local page settings. Any settings that you define here will override the global settings set in Theme Options.
Tip
It is generally considered good practice to set up the look and feel of your site on a global level, and override the settings when necessary on a local level. This will save you a lot of time, unlike if you were to set up every page separately.
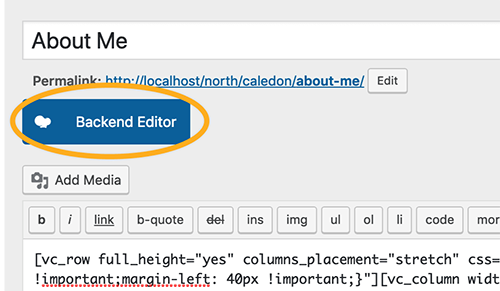
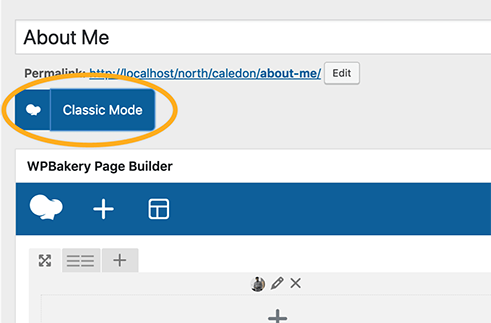
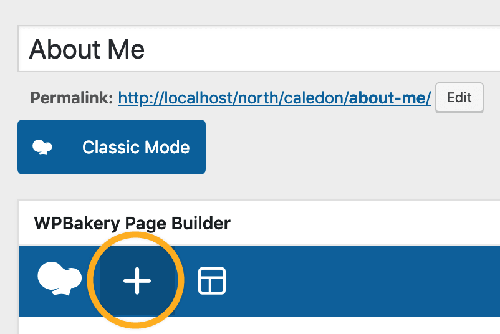
To start adding elements to your page, first make sure that you are in the backend editor view. If the blue button near the top left of the page says BACKEND EDITOR, click on it to enable the Visual Composer page builder view. Once you’re in the Visual Composer view, the blue button will say CLASSIC MODE. You can now click on the Add Element button to start adding elements to your page. You can learn more about elements in the Custom Shortcodes section of this user guide.
Warning
Please note that the Frontend view for Visual Composer has been intentionally disabled since some of the added custom shortcodes require page reload because of script calculations, and due to this do not appear on the page while building with the Frontend view. The Frontend view can be used. However, while building your page some elements might not display properly until you refresh the page. If you would like to use the Frontend view, you can enable it by navigating to wp-content/themes/caledon/framework/modules/visualcomposer/visual-composer-config.php and in that file finding the following piece of code: if(function_exists('vc_disable_frontend')){vc_disable_frontend();} and either removing or commenting it out. To disable the Frontend view again you just need to uncomment or return this code.
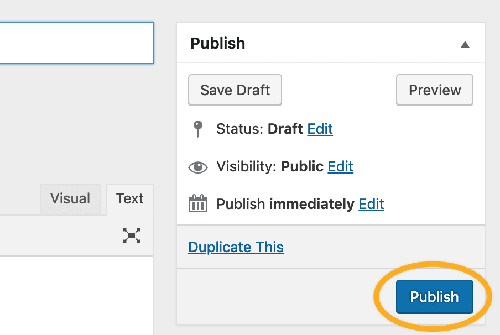
Finally, click the Publish button in the upper right section of the page. (If you made some changes on an already published page, you will see an Update button instead).
